Users
A User is someone who has been given Permission to Edit, Manage, Report, Configure or Build your website using Sitekit CMS. You can Add, Modify or Delete Users. Additionally you can export their details to a CSV file.
On sites with Extranets, users with Extranet Security Permissions tend to heavily outnumber users with administration rights. So there is a separate facility for adding New Extranet Members.
Add a user
- Click Users on the Manage tab.
- Click Add.
- The Add User screen now opens. Enter the information listed below.
- Full Name - type in the box the user's full name.
- Username - type in the box a username that is unique to this site.
- Email - type in the box the user's email address. In order to access the 'Lost Password' function this must be a unique address.
- Password - type in the box a password of at least 5 characters. Confirm Password -repeat the password.
- Expiry - a user's rights to access the system are time limited. Click on the pop-up calendar icon and the pop-up time picker icon to select the date and time for expiry of this user's access rights.
- Photograph/Avatar - You can upload a photograph or avatar of the user to help personalise their profile.
- User Group - select from the drop-down list the user group to which will serve as the User's Master User Group. this user belongs. Add any other User Groups that you wish the User to belong to. (see Multiple User Groups).
- Address Details - Address, Town, County, Post Code and Country.
- Department - if applicable, type in the box the department within your organisation to which this user belongs.
- Telephone and Fax - type in the boxes the user's phone and fax numbers.
- Complete the Job Title and Additional Details boxes as required.
- Generate and associate a cryptography key if using secure forms, see below. (added in 11.0)
- Click Publish.
Edit a user
- Click Users on the Manage tab.
- Find the user on the list and click the Username or click Edit in the Actions column.
- Edit the user's details as required (steps 5 to 13 above).
Delete a user
- Click Users on the Manage tab.
- Find the user on the list and click Delete in the Actions column. Note: The user will be permanently deleted from the system.
- A pop-up window will now appear, asking you to confirm the deletion. Click OK to confirm the deletion, or Cancel to undo it.
Export user details to CSV
To export the details of all the users of the site as a CSV (comma separated values) file:
- Click Users on the Manage tab.
- Scroll to the bottom of the users section and click Export to CSV.
- Select a folder on your computer and click Save.
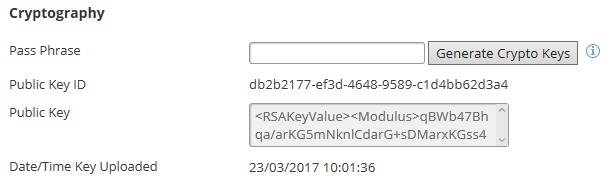
Cryptography
Cryptographic keys are associated with a specific user and are needed to decrypt secure form submissions, not all users need them. They can be created when the user is created or added to an existing user. The process is as follows
- If it's a new user fill in the relevant other user details first.
- Enter a pass phrase in the relevant field, click on Generate Crypto Keys. Pick something which will be easy to remember. This phrase will be needed whenever you decrypt securely submitted form data

- This will generate the relevant keys. Click on Download Key and download and save your key in a secure location. This key file should be stored safely away, somewhere where it cannot be stolen or accidentally deleted. Don’t keep it on the pc which created the key in the first place. This is your security backup. This should be kept in a different location from your pass phrase. The key file should have the name of the relevant user and a ‘.key’ file extension
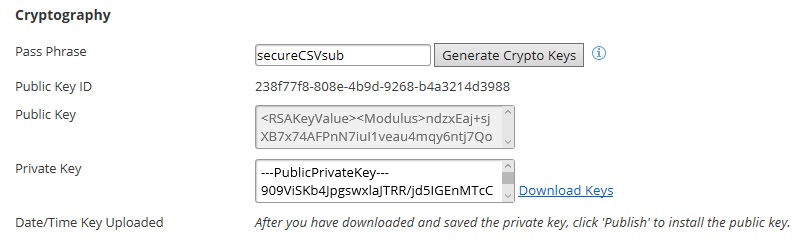
- Very important, click on Publish to save your changes and associate that key with the user. The date time uploaded field will now indicate the the key is uploaded
For more information on secure form use, use the following links.
Adding an Extranet Member
Creating a new member is identical to creating a New User. When you click this option you're taken to an Add User screen which is optimized purely for entering Extranet Users.
Sitekit 9.6 introduced the ability to assign a Member to multiple User Groups. Previous versions of Sitekit CMS only allowed a member to belong to a single User Group.
Add a Member
- Click Members in the Manage tab.
- The User Group will default to Extranet, so you don't need to touch this.
- Click Add Member.
- The Add Member screen now opens. Enter the information listed below.
- Full Name - type in the box the member's full name.
- Username - type in the box a username that is unique to this site.
- Email - type in the box the user's email address. In order to access the 'Lost Password' function this must be a unique address.
- Password - type in the box a password of at least 5 characters. Confirm Password -repeat the password.
- Expiry - a user's rights to access the system are time limited. Click on the pop-up calendar icon and the pop-up time picker icon to select the date and time for expiry of this user's access rights.
- Photograph/Avatar - You can upload a photograph or avatar of the user to help personalise their profile.
- User Group - In versions of Sitekit CMS earlier than 9.6, this was fixed to the Extranet User Group and could not be changed. But in CMS 9.6 a Member can belong to Multiple User Groups.
- Address Details - Address, Town, County, Post Code and Country.
- Department - if applicable, type in the box the department within your organisation to which this user belongs.
- Telephone and Fax - type in the boxes the user's phone and fax numbers.
- Complete the Job Title and Additional Info boxes as required.
- Click Publish.
Edit a Member
- Click Members on the Manage tab.
- Find the Member on the list and click the Username or click Edit in the Actions column.
- Edit the member's details as required (steps 5 to 13 above).
Delete a Member
- Click Members on the Manage tab.
- Find the member on the list and click Delete in the Actions column. Note: The member will be permanently deleted from the system.
- A popup window will now appear, asking you to confirm the deletion. Click OK to confirm the deletion, or Cancel to undo it.
Export Member details to CSV
To export the details of all the Extranet members of the site as a CSV (comma separated values) file:
- Click Members on the Manage tab.
- Scroll to the bottom of the users section and click Export to CSV.
- Select a folder on your computer and click Save.