Configure a page commenting block
Once you have created a Page Commenting Invitation, you can configure it by fiollowing these steps.
- Click Page Commenting on the Configure tab. A list of all the existing Page Comment blocks will now be displayed.
- Select the page that you want to configure.
- Click the Edit command, and a Page Commenting Editor will open, similar to the one shown below.
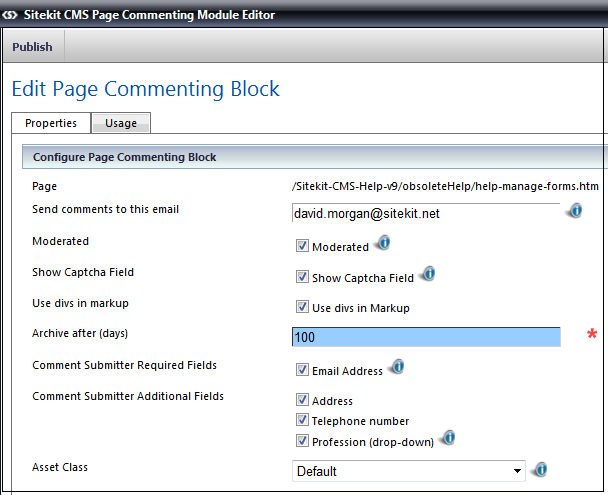
You can now select the options you wish to display
- Configure the following details as required.
- Moderated - tick this box if you want comments to be approved before they are published on the page.
- Show Captcha field - tick this box if you want to protect your page from automated spam. The captcha field asks the user to type a random piece of text that is generated as an image.
- Use divs (rather than tables) - tick this box if you want the HTML thats ourput to make use of <div> and their respective classes rather than tables
- Send comments to this email - type in this box the email address to which you would like copies of new comments to be sent. The email acts as a prompt to the recipient informing them of the new comments.
- Archive after - enter the number of days after which the comments will no longer be displayed on the page.
- Comment submitter required fields: Email address - tick this box if you want the person leaving the comment to be forced into including an email address with the comment.
- Comment submitter additional fields - tick these boxes if you want the person leaving the comment to provide you with this information. These details will not be displayed on the page but will be sent to the administrator.
- Select the Asset Class.
- Finally, click Publish.
Close the screen and open the Page containing the Page Commenting Invitation, and verify that it contains the options you selected, and looks neat and tidy.